There are two audio cables. The preparation is the same for both. Only the connections to the interface are different.
| Before you start, unscrew the metal audio connectors and slide the orange and white cable through the spring, then the cover and finally the clear plastic protector. Now strip back a few inches of the cable. This cable is like the yellow cable you worked with for the serial port. This time we will wire both black and red and ground wires. | 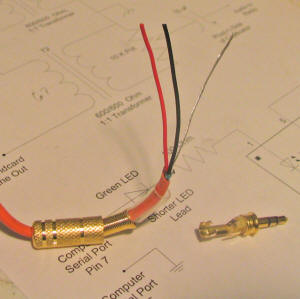 |
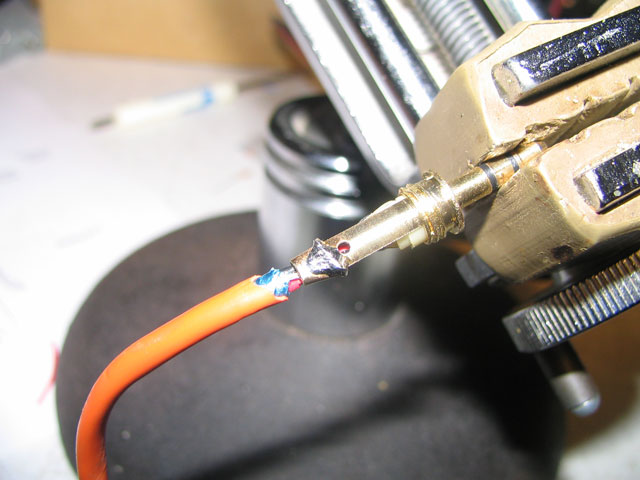
| Strip the red and black wires so there is only about 1/2 inch of insulation exposed. But leave the wire a lot longer as it's easer to handle. Carefully twist the wire ends together to make then smooth. Cut off the very end at an angle so it's sharp. Now push the wire through the small holes on the connector. Make sure they go in the holes indicated. I know it's a tight fit, but they will go through as in the picture. If it turns out you can't get it to go then the second best way is to just tin the connector and tin the wire and then solder them both together. No matter which way you do it, make sure the wires are short and not touching each other. | 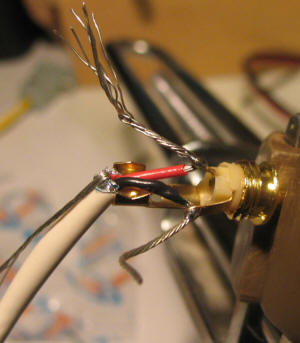 |
| That should leave the bare wire. Wrap it around the back of the connector and solder. Use pliers to pinch the end of the connector to lightly hold the cable body. Now slide the clear plastic protector over the connector body. Then screw the body together. Do the same to the other cable. |  |
You should now have a white and orange cable with connectors on one end and the other end still raw. Lets take advantage of this and test your soldering job. - Strip a few inches off the raw ends and strip back 1/4 inch of insulation on all the wires.
- With an Ohm meter test to make sure there is an open between the red, black and bare wires.
- Check to see a short between the red wire and the tip of the connector. (Very end of the connector)
- Check to see a short between the ring of the connector and the black wire. (Middle ring on the connector)
- Check for a short between the bare ground wire and the sleeve of the connector. (Body of the connector)
If all checks out okay.. Woo-Hoo.. we are in the home stretch now. Lets attach the two cables to the board. |
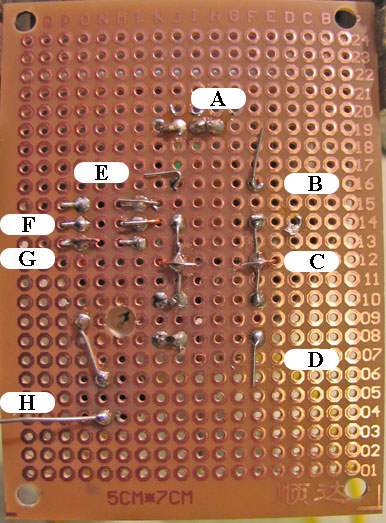
| The black wire isn't used at this time so as before, wrap it around the cable body so it can be used later. Do this to both cables The Orange cable : Put the bare ground wire through hole C-13 and pull tight and solder to F-13. Now run the red wire through hole E-16 to the loose transformer wire at F-16 Solder both together |  |
The White cable: Push the bare ground wire of the white cable through hole E-10 and solder to the common ground at F-10 Push the red wire through the hole at E-8 and solder it to the loose end of the transformer at F-8 Solder both together. |  |
| Now all we need to do is lash down the 3 cables so we don't break then off. Use the supplied bare wire to lash the wires down. I suggest you start the wire in a spare hole and solder it to keep it from moving. I just wound it in and out a few times and then pulled it tight and soldered it in place. It isn't critical. Just make sure you don't cover the mounting holes. |  |
| A quick check should show the following: The red wire from the orange cable should be connected to B
The ground from the orange and white cables should be connected to C
The red wire from the white cable should be connected to D | 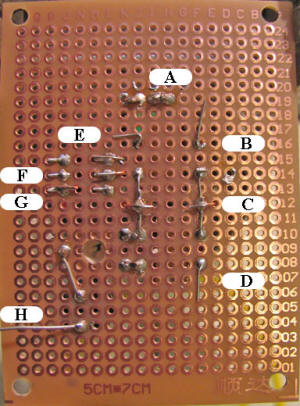 |
| This finishes up the computer cables. The white cable is the soundcard's audio line out or speaker
The orange wire is the soundcards audio line in or microphone
If you have a choice, use the computers line in and out connectors.
Now lets test this baby once more.
- Now you should read about 67 ohms between the connector tip and the connector body.
- You should read about double that between the two connector tips. ( about 134 ohms ).
- Measure zero (short) between the serial connector pin 5 and the two audio connector bodies.
The Club Website will have the latest version of these directions.
Take a look at http://chestercountyarc.com/digital or contact me at joel@cyberbest.com |